38

画像コンテンツ ビューを含むスクロール ビューが必要です。画像は実際には画面よりもはるかに大きい地図です。iPhone を横向きにすると、写真アプリの写真のように、マップは最初はスクロール ビューの中央にあるはずです。

代替テキスト

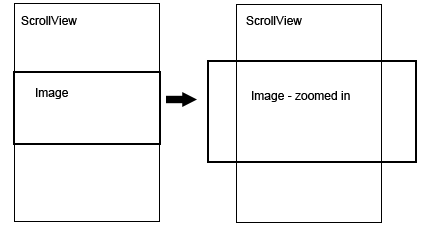
正しいズームとスクロールを同時に行って、マップを中央に配置することができませんでした。マップ イメージが画面の上部 (縦向き) から始まる場合、コードは次のようになります。

- (void)loadView {
    mapView = [[UIImageView alloc] initWithImage:[UIImage imageNamed:@"map.jpg"]];
    CGFloat mapHeight = MAP_HEIGHT * SCREEN_WIDTH / MAP_WIDTH;
    mapView.frame = CGRectMake(0, 0, SCREEN_WIDTH, mapHeight);
    scrollView = [[UIScrollView alloc] initWithFrame:CGRectMake(0, 0, SCREEN_WIDTH, SCREEN_HEIGHT)];
    scrollView.delegate = self;
    scrollView.contentSize = mapView.frame.size;
    scrollView.maximumZoomScale = MAP_WIDTH / SCREEN_WIDTH;
    scrollView.minimumZoomScale = 1;
    [scrollView addSubview:mapView];
    self.view = scrollView;
}

画像フレームを中央に移動すると、画像はフレームの上から下にのみ成長します。imageViewのフレームを動的に変更して、mapView変換をいじってみました。これまでのところ、何もうまくいきません。

4

11 に答える 11

40

このコードは、iOS のほとんどのバージョンで動作するはずです (また、3.1 以上で動作することがテストされています)。

これは、Jonah's answer で言及されている Apple WWDC コードに基づいています。

以下を UIScrollView のサブクラスに追加し、 tileContainerView を画像またはタイルを含むビューに置き換えます。

- (void)layoutSubviews {
    [super layoutSubviews];

    // center the image as it becomes smaller than the size of the screen
    CGSize boundsSize = self.bounds.size;
    CGRect frameToCenter = tileContainerView.frame;

    // center horizontally
    if (frameToCenter.size.width < boundsSize.width)
        frameToCenter.origin.x = (boundsSize.width - frameToCenter.size.width) / 2;
    else
        frameToCenter.origin.x = 0;

    // center vertically
    if (frameToCenter.size.height < boundsSize.height)
        frameToCenter.origin.y = (boundsSize.height - frameToCenter.size.height) / 2;
    else
        frameToCenter.origin.y = 0;

    tileContainerView.frame = frameToCenter;
}
于 2010-08-13T16:42:33.500 に答える
22

これが私が考えていることです。ソリューションは、アップルの写真アプリとまったく同じように動作します。私は以下を使用するソリューションを使用していました。

-(void) scrollViewDidEndZooming:(UIScrollView *)scrollView withView:(UIView *)view atScale:(float)scale

中心に戻しますが、私はその解決策が好きではありませんでした。なぜなら、ズームが行われた後、それが跳ね返り、非常に魅力的でない中心に素早く「ジャンプ」するからです。まったく同じロジックを実行すると、このデリゲート関数で次のようになります。

-(void)scrollViewDidZoom:(UIScrollView *)pScrollView

どちらも中央から始まり、ズームアウトしても中央に留まります。

-(void)scrollViewDidZoom:(UIScrollView *)pScrollView {
CGRect innerFrame = imageView.frame;
CGRect scrollerBounds = pScrollView.bounds;

if ( ( innerFrame.size.width < scrollerBounds.size.width ) || ( innerFrame.size.height < scrollerBounds.size.height ) )
{
    CGFloat tempx = imageView.center.x - ( scrollerBounds.size.width / 2 );
    CGFloat tempy = imageView.center.y - ( scrollerBounds.size.height / 2 );
    CGPoint myScrollViewOffset = CGPointMake( tempx, tempy);

    pScrollView.contentOffset = myScrollViewOffset;

}

UIEdgeInsets anEdgeInset = { 0, 0, 0, 0};
if ( scrollerBounds.size.width > innerFrame.size.width )
{
    anEdgeInset.left = (scrollerBounds.size.width - innerFrame.size.width) / 2;
    anEdgeInset.right = -anEdgeInset.left;  // I don't know why this needs to be negative, but that's what works
}
if ( scrollerBounds.size.height > innerFrame.size.height )
{
    anEdgeInset.top = (scrollerBounds.size.height - innerFrame.size.height) / 2;
    anEdgeInset.bottom = -anEdgeInset.top;  // I don't know why this needs to be negative, but that's what works
}
pScrollView.contentInset = anEdgeInset;
}

「imageView」は、UIImageView使用している場所です。

于 2010-02-03T02:51:58.273 に答える
7

Apple は、iphone 開発者プログラムのすべてのメンバーに 2010 WWDC セッション ビデオをリリースしました。議論されたトピックの 1 つは、彼らが写真アプリを作成した方法です!!! 彼らは非常によく似たアプリを段階的に構築し、すべてのコードを無料で利用できるようにしました。

プライベート API も使用しません。秘密保持契約のため、ここにコードを掲載することはできませんが、サンプル コードのダウンロードへのリンクを次に示します。アクセスするには、おそらくログインする必要があります。

http://connect.apple.com/cgi-bin/WebObjects/MemberSite.woa/wa/getSoftware?code=y&source=x&bundleID=20645

また、iTunes WWDC ページへのリンクは次のとおりです。

http://insideapple.apple.com/redir/cbx-cgi.do?v=2&la=en&lc=&a=kGSol9sgPHP%2BtlWtLp%2BEP%2FnxnZarjWJglPBZRHd3oDbACudP51JNGS8KlsFgxZto9X%2BTsnqSbeUSWX0doe%2Fzv%2FN5XV55%2FomsyfRgFBysOnIVggO%2Fn2p%2BiweDK%2F%2FmsIXj

于 2010-06-20T19:48:36.720 に答える
2

UIScrollView'sを設定する必要があると思いますcontentOffset

于 2009-03-12T19:16:05.013 に答える
1

これは私のために働いた:

- (void) scrollViewDidEndZooming:(UIScrollView *)scrollView withView:(UIView *)view atScale:(float)scale {
CGFloat tempx = view.center.x-160;
CGFloat tempy = view.center.y-160;
myScrollViewOffset = CGPointMake(tempx,tempy);

}

ここで、160はの幅/高さの半分UIScrollViewです。

その後、contentoffsetをここでキャプチャしたものに設定しました。

于 2009-03-31T08:15:00.383 に答える
1

そんなに単純だったらいいのに。ネットで調べたところ、これは私だけの問題ではなく、多くの人が iPhone だけでなく、Apple のデスクトップ Cocoa でも同じ問題に苦しんでいることがわかりました。次のリンクを参照してください。

http://www.iphonedevsdk.com/forum/iphone-sdk-development/5740-uiimageview-uiscrollview.html
説明されている解決策は、画像のプロパティ UIViewContentModeScaleAspectFit に基づいていますが、残念ながらうまく機能しません。中央に配置され、適切に成長しますが、バウンス領域は画像よりもはるかに大きいようです.

この男も答えを得ませんでした:
http://discussions.apple.com/thread.jspa?messageID=8322675

そして最後に、Apple のデスクトップ Cocoa での同じ問題:
http://www.cocoadev.com/index.pl?CenteringInsideNSScrollView
解決策は機能すると思いますが、iPhone にはない NSClipView に基づいています...

誰かがiPhoneで動作するソリューションを持っていますか?

于 2009-03-13T07:29:54.670 に答える
0

さて、私はこの問題に対するかなり良い解決策を見つけたと思います。コツは、常に imageView のフレームを再調整することです。これは、contentInsets または contentOffSets を常に調整するよりもはるかにうまく機能することがわかりました。縦向きと横向きの両方の画像に対応するために、コードを少し追加する必要がありました。

コードは次のとおりです。

- (void) scrollViewDidEndZooming:(UIScrollView *)scrollView withView:(UIView *)view atScale:(float)scale {

CGSize screenSize = [[self view] bounds].size;

if (myScrollView.zoomScale <= initialZoom +0.01) //This resolves a problem with the code not working correctly when zooming all the way out.
{
    imageView.frame = [[self view] bounds];
    [myScrollView setZoomScale:myScrollView.zoomScale +0.01];
}

if (myScrollView.zoomScale > initialZoom)
{
    if (CGImageGetWidth(temporaryImage.CGImage) > CGImageGetHeight(temporaryImage.CGImage)) //If the image is wider than tall, do the following...
    {
            if (screenSize.height >= CGImageGetHeight(temporaryImage.CGImage) * [myScrollView zoomScale]) //If the height of the screen is greater than the zoomed height of the image do the following...
            {
                    imageView.frame = CGRectMake(0, 0, 320*(myScrollView.zoomScale), 368);
            }
            if (screenSize.height < CGImageGetHeight(temporaryImage.CGImage) * [myScrollView zoomScale]) //If the height of the screen is less than the zoomed height of the image do the following...
            {
                    imageView.frame = CGRectMake(0, 0, 320*(myScrollView.zoomScale), CGImageGetHeight(temporaryImage.CGImage) * [myScrollView zoomScale]);
            }
    }
    if (CGImageGetWidth(temporaryImage.CGImage) < CGImageGetHeight(temporaryImage.CGImage)) //If the image is taller than wide, do the following...
    {
            CGFloat portraitHeight;
            if (CGImageGetHeight(temporaryImage.CGImage) * [myScrollView zoomScale] < 368)
            { portraitHeight = 368;}
            else {portraitHeight = CGImageGetHeight(temporaryImage.CGImage) * [myScrollView zoomScale];}

            if (screenSize.width >= CGImageGetWidth(temporaryImage.CGImage) * [myScrollView zoomScale]) //If the width of the screen is greater than the zoomed width of the image do the following...
            {
                    imageView.frame = CGRectMake(0, 0, 320, portraitHeight);
            }
            if (screenSize.width < CGImageGetWidth (temporaryImage.CGImage) * [myScrollView zoomScale]) //If the width of the screen is less than the zoomed width of the image do the following...
            {
                    imageView.frame = CGRectMake(0, 0, CGImageGetWidth(temporaryImage.CGImage) * [myScrollView zoomScale], portraitHeight);
            }
    }
    [myScrollView setZoomScale:myScrollView.zoomScale -0.01];
}
于 2009-10-04T02:16:27.800 に答える
0

のコンテンツを中央に配置するエレガントな方法の 1 つがこれUISCrollViewです。

のcontentSizeに1 つのオブザーバーを追加UIScrollViewすると、コンテンツが変更されるたびにこのメソッドが呼び出されます...

[myScrollView addObserver:delegate 
               forKeyPath:@"contentSize"
                  options:(NSKeyValueObservingOptionNew) 
                  context:NULL];

オブザーバーメソッドで:

- (void)observeValueForKeyPath:(NSString *)keyPath   ofObject:(id)object   change:(NSDictionary *)change   context:(void *)context { 

    // Correct Object Class.
    UIScrollView *pointer = object;

    // Calculate Center.
    CGFloat topCorrect = ([pointer bounds].size.height - [pointer viewWithTag:100].bounds.size.height * [pointer zoomScale])  / 2.0 ;
            topCorrect = ( topCorrect < 0.0 ? 0.0 : topCorrect );

    topCorrect = topCorrect - (  pointer.frame.origin.y - imageGallery.frame.origin.y );

    // Apply Correct Center.
    pointer.center = CGPointMake(pointer.center.x,
                                 pointer.center.y + topCorrect ); }
  • を変更する必要があり[pointer viewWithTag:100]ます。コンテンツ ビューに置き換えますUIView

    • またimageGallery、ウィンドウのサイズを指すように変更します。

これにより、サイズが変更されるたびにコンテンツの中心が修正されます。

注:このコンテンツがうまく機能しない唯一の方法は、UIScrollView.

于 2009-11-03T17:14:45.793 に答える
0

私のために働いたモノタッチで。

this._scroll.ScrollRectToVisible(new RectangleF(_scroll.ContentSize.Width/2, _scroll.ContentSize.Height/2,1,1),false);
于 2012-08-08T14:45:59.493 に答える
0

注:この方法は機能します。画像が imageView よりも小さい場合、部分的にスクロールして画面からはみ出します。大したことではありませんが、写真アプリほど良くもありません.

まず、2 つのビュー、画像を含むイメージビューと、イメージビューを含むスクロールビューを扱っていることを理解することが重要です。したがって、最初にイメージビューを画面のサイズに設定します。

 [myImageView setFrame:self.view.frame];

次に、画像を画像ビューの中央に配置します。

 myImageView.contentMode = UIViewContentModeCenter;

ここに私のコード全体があります:

- (void)viewDidLoad {
AppDelegate *appDelegate = (pAppDelegate *)[[UIApplication sharedApplication] delegate];
 [super viewDidLoad];
 NSString *Path = [[NSBundle mainBundle] bundlePath];
 NSString *ImagePath = [Path stringByAppendingPathComponent:(@"data: %@", appDelegate.MainImageName)];
 UIImage *tempImg = [[UIImage alloc] initWithContentsOfFile:ImagePath];
 [imgView setImage:tempImg];

 myScrollView = [[UIScrollView alloc] initWithFrame:[[self view] bounds]];
 [myScrollView addSubview:myImageView];

//Set ScrollView Appearance
 [myScrollView setBackgroundColor:[UIColor blackColor]];
 myScrollView.indicatorStyle = UIScrollViewIndicatorStyleWhite;

//Set Scrolling Prefs
 myScrollView.bounces = YES;
 myScrollView.delegate = self;
 myScrollView.clipsToBounds = YES; // default is NO, we want to restrict drawing within our scrollview
 [myScrollView setCanCancelContentTouches:NO];
 [myScrollView setScrollEnabled:YES];


//Set Zooming Prefs
 myScrollView.maximumZoomScale = 3.0;
 myScrollView.minimumZoomScale = CGImageGetWidth(tempImg.CGImage)/320;
 myScrollView.zoomScale = 1.01; //Added the .01 to enable scrolling immediately upon view load.
 myScrollView.bouncesZoom = YES;


 [myImageView setFrame:self.view.frame];//rect];// .frame.size.height = imageHeight;
 myImageView.contentMode = UIViewContentModeCenter;
 self.view = myScrollView;
 [tempImg release];
 }
于 2009-09-08T02:14:18.973 に答える
0

@JosephHの回答に似た別の解決策がありますが、これは画像の実際の寸法を考慮しています。ユーザーがパン/ズームするときに、画面に必要以上の空白が表示されないようにします。これは、縦長の画面に横長の画像を表示する場合などによくある問題です。画像全体が画面上にある場合 (アスペクト フィット)、画像の上下に空白ができます。次に、ズームインすると、他のソリューションはその空白を画像の一部と見なします。これは、imageView にあるためです。画像の大部分を画面外にパンして、空白だけを表示できるようにします。これはユーザーにとって悪いように見えます。

このクラスでは、操作対象の imageView を渡す必要があります。私はそれを自動検出させたいと思っていましたが、これはより高速であり、layoutSubviewsメソッドで得られるすべての速度が必要です.

注: 現状では、これには scrollView に対して AutoLayout が有効になっていないことが必要です。

//
//  CentringScrollView.swift
//  Cerebral Gardens
//
//  Created by Dave Wood
//  Copyright © 2016 Cerebral Gardens Inc. All rights reserved.
//

import UIKit

class CentringScrollView: UIScrollView {

    var imageView: UIImageView?

    override func layoutSubviews() {
        super.layoutSubviews()

        guard let superview = superview else { return }
        guard let imageView = imageView else { return }
        guard let image = imageView.image else { return }

        var frameToCentre = imageView.frame

        let imageWidth = image.size.width
        let imageHeight = image.size.height

        let widthRatio = superview.bounds.size.width / imageWidth
        let heightRatio = superview.bounds.size.height / imageHeight

        let minRatio = min(widthRatio, heightRatio, 1.0)

        let effectiveImageWidth = minRatio * imageWidth * zoomScale
        let effectiveImageHeight = minRatio * imageHeight * zoomScale

        contentSize = CGSize(width: max(effectiveImageWidth, bounds.size.width), height: max(effectiveImageHeight, bounds.size.height))

        frameToCentre.origin.x = (contentSize.width - frameToCentre.size.width) / 2
        frameToCentre.origin.y = (contentSize.height - frameToCentre.size.height) / 2

        imageView.frame = frameToCentre
    }
}
于 2016-05-05T09:56:02.867 に答える