この効果をphpで作成する必要があります。PHPの画像フィルターに IMG_FILTER_PIXELATE があることは知っています。しかし、もっと滑らかでエンボス加工する必要がありますか? この画像のように:

この効果により、ユーザーがアップロードした画像がピクセル化され、画像の端が赤くなります (IMG_FILTER_EDGEDETECT は知っていますが、それを使用して端の色を変更する方法がわかりません)。
これを行う方法がわかりません。
最後の答えは理論的なもので十分ではないように思われたので、実用的な例を作成しました
。必要に応じて自由に編集してください。
<?php
/* Function to make pixelated images
* Supported input: .png .jpg .jpeg .gif
*
*
* Created on 24.01.2011 by Henrik Peinar
*/


/*
* image - the location of the image to pixelate
* pixelate_x - the size of "pixelate" effect on X axis (default 10)
* pixelate_y - the size of "pixelate" effect on Y axis (default 10)
* output - the name of the output file (extension will be added)
*/
function pixelate($image, $output, $pixelate_x = 20, $pixelate_y = 20)
{
    // check if the input file exists
    if(!file_exists($image))
        echo 'File "'. $image .'" not found';

    // get the input file extension and create a GD resource from it
    $ext = pathinfo($image, PATHINFO_EXTENSION);
    if($ext == "jpg" || $ext == "jpeg")
        $img = imagecreatefromjpeg($image);
    elseif($ext == "png")
        $img = imagecreatefrompng($image);
    elseif($ext == "gif")
        $img = imagecreatefromgif($image);
    else
        echo 'Unsupported file extension';

    // now we have the image loaded up and ready for the effect to be applied
    // get the image size
    $size = getimagesize($image);
    $height = $size[1];
    $width = $size[0];

    // start from the top-left pixel and keep looping until we have the desired effect
    for($y = 0;$y < $height;$y += $pixelate_y+1)
    {

        for($x = 0;$x < $width;$x += $pixelate_x+1)
        {
            // get the color for current pixel
            $rgb = imagecolorsforindex($img, imagecolorat($img, $x, $y));

            // get the closest color from palette
            $color = imagecolorclosest($img, $rgb['red'], $rgb['green'], $rgb['blue']);
            imagefilledrectangle($img, $x, $y, $x+$pixelate_x, $y+$pixelate_y, $color);

        }
    }

    // save the image
    $output_name = $output .'_'. time() .'.jpg';

    imagejpeg($img, $output_name);
    imagedestroy($img);
}


pixelate("test.jpg", "testing");


?>
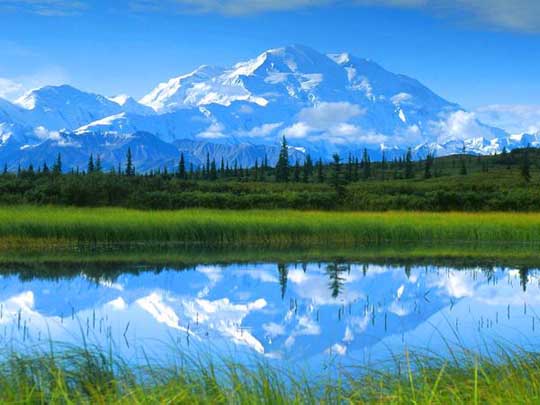
これは、画像にピクセル化効果を作成する関数の例です。この関数を使用した結果の例を次に示します。
オリジナル:
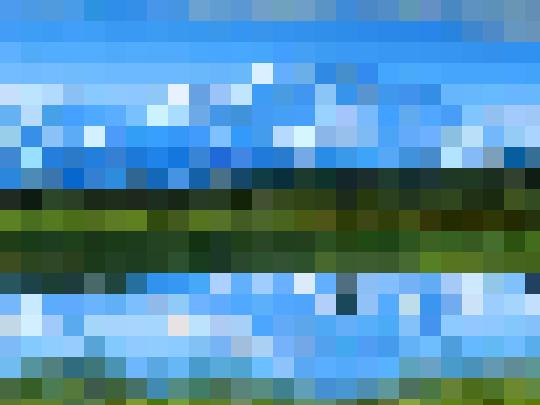
ピクセル化 5px:ピクセル化
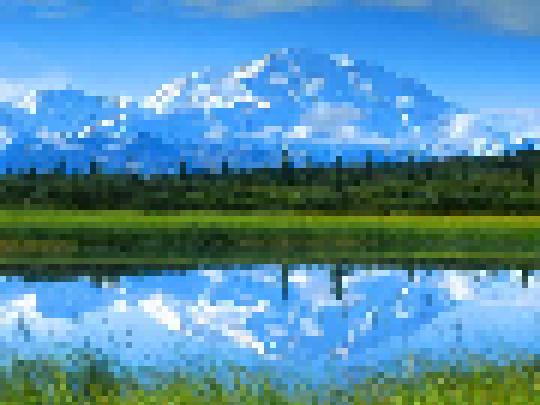
10px:ピクセル化

20px:
ご回答ありがとうございます。私はあなたの関数を使用し、別のループを追加して、 http://www.php.net/manual/en/function.imageline.phpの imagelinethick という関数を使用して、正方形の外側のピクセルの色を変更しました。したがって、次のようになりました。
<?php
$image = imagecreatefromjpeg('Penguins.jpg');
$imagex = imagesx($image);
$imagey = imagesy($image);

$pixelate_y=10;
$pixelate_x=10;
$height=$imagey;
$width=$imagex;
for($y = 0;$y < $height;$y += $pixelate_y+1)
{
    for($x = 0;$x < $width;$x += $pixelate_x+1)
    {
    // get the color for current pixel
    $rgb = imagecolorsforindex($image, imagecolorat($image, $x, $y));

    // get the closest color from palette
    $color = imagecolorclosest($image, $rgb['red'], $rgb['green'], $rgb['blue']);

    imagefilledrectangle($image, $x, $y, $x+$pixelate_x, $y+$pixelate_y, $color);
    }
}


for($y = 0;$y < $height;$y += $pixelate_y+1)
{
for($x = 0;$x < $width;$x += $pixelate_x+1)
{
    //make a border line for each square
    $rgb = imagecolorsforindex($image, imagecolorat($image, $x, $y));
    $color = imagecolorclosest($image, 123, 123, 123);
    imagelinethick($image, $x, $y, $x, $y+$pixelate_y, $color, 1);
    imagelinethick($image, $x, $y, $x+$pixelate_x, $y, $color, 2);
}
}

function imagelinethick($image, $x1, $y1, $x2, $y2, $color, $thick = 1)
{
    /* this way it works well only for orthogonal lines
    imagesetthickness($image, $thick);
    return imageline($image, $x1, $y1, $x2, $y2, $color);
    */
    if ($thick == 1) {
        return imageline($image, $x1, $y1, $x2, $y2, $color);
    }
$t = $thick / 2 - 0.5;
if ($x1 == $x2 || $y1 == $y2) {
    return imagefilledrectangle($image, round(min($x1, $x2) - $t), round(min($y1, $y2) - $t), round(max($x1, $x2) + $t), round(max($y1, $y2) + $t), $color);
}
$k = ($y2 - $y1) / ($x2 - $x1); //y = kx + q
$a = $t / sqrt(1 + pow($k, 2));
$points = array(
    round($x1 - (1+$k)*$a), round($y1 + (1-$k)*$a),
    round($x1 - (1-$k)*$a), round($y1 - (1+$k)*$a),
    round($x2 + (1+$k)*$a), round($y2 - (1-$k)*$a),
    round($x2 + (1-$k)*$a), round($y2 + (1+$k)*$a),
);
imagefilledpolygon($image, $points, 4, $color);
return imagepolygon($image, $points, 4, $color);
}

header("Content-Type: image/JPEG");
imageJPEG($image, "", 75);

?>
結果は次のようになります: http://www.flickr.com/photos/52700219@N06/6759029339/
しかし、これをよりスムーズにするためには、まだ改善が必要だと思います。
これは問題に対する私の試みです。
ピクセル化ブロックのサイズを変更したり、コントラストの高い画像の効果を和らげるぼかしを適用したりできます。ただし、ピクセル化ブロック サイズが小さい大きな画像では遅くなる可能性があります。
スクリプトは、関連するピクセルの色を配列に格納します。次に、画像をエンボスし、必要に応じてコントラストを変更し、imagefilter() 関数を使用して画像をピクセル化し、(タイル エンハンスが設定されている場合) 再度エンボスします (これにより、最終的なタイルの 3D 効果が向上します)。ぼかしが必要な場合、スクリプトはガウスぼかしを適用します。次にスクリプトは、カラー配列を使用して塗りつぶされた正方形を描画し、エンボスタイルの境界内にカラフルなピクセル化効果を作成します。
function pixelatemboss($image,$blockwidth=10,$blur=5,$tileenhance="true",$contrast=0,$negate="true")
{
    if($blockwidth>1)
    {
        imagefilter($image,IMG_FILTER_CONTRAST,$contrast);

        for($x=1;$x<imagesx($image);$x=$x+$blockwidth)
        {
            for($y=1;$y<imagesy($image);$y=$y+$blockwidth)
            {
                $color[$x][$y]=imagecolorat($image,$x,$y);
            }
        }

        imagefilter($image,IMG_FILTER_EMBOSS);
        imagefilter($image,IMG_FILTER_CONTRAST,$contrast);
        imagefilter($image,IMG_FILTER_PIXELATE,$blockwidth,false);
        if($tileenhance=="true")
        {
            imagefilter($image,IMG_FILTER_EMBOSS);
        }
        for($b=0;$b<$blur;$b++)
        {
            imagefilter($image,IMG_FILTER_GAUSSIAN_BLUR);
        }
        for($x=1;$x<imagesx($image);$x=$x+$blockwidth)
        {
            for($y=1;$y<imagesy($image);$y=$y+$blockwidth)
            {
                $rgb=$color[$x][$y];
                $r = ($rgb >> 16) & 0xFF;
                $g = ($rgb >> 8) & 0xFF;
                $b = $rgb & 0xFF;
                $col=imagecolorallocate($image,$r,$g,$b);
                imagefilledrectangle($image,$x,$y,$x+($blockwidth-2),$y+($blockwidth-2),$col);
            }
        }
    }
    return $image;
}
PHP 5.4 以降の場合、以下を使用する必要があります。
imageJPEG($image, NULL, 75);
二重引用符を使用して NULL を指定することはできなくなりました (この例のように)。
imageJPEG($image, "", 75);